

Travel-a-Go-Go

Tres Leches Cake

Bringing the World We’ve Traveled…to Your Dining Table.

The Story Behind the Dish

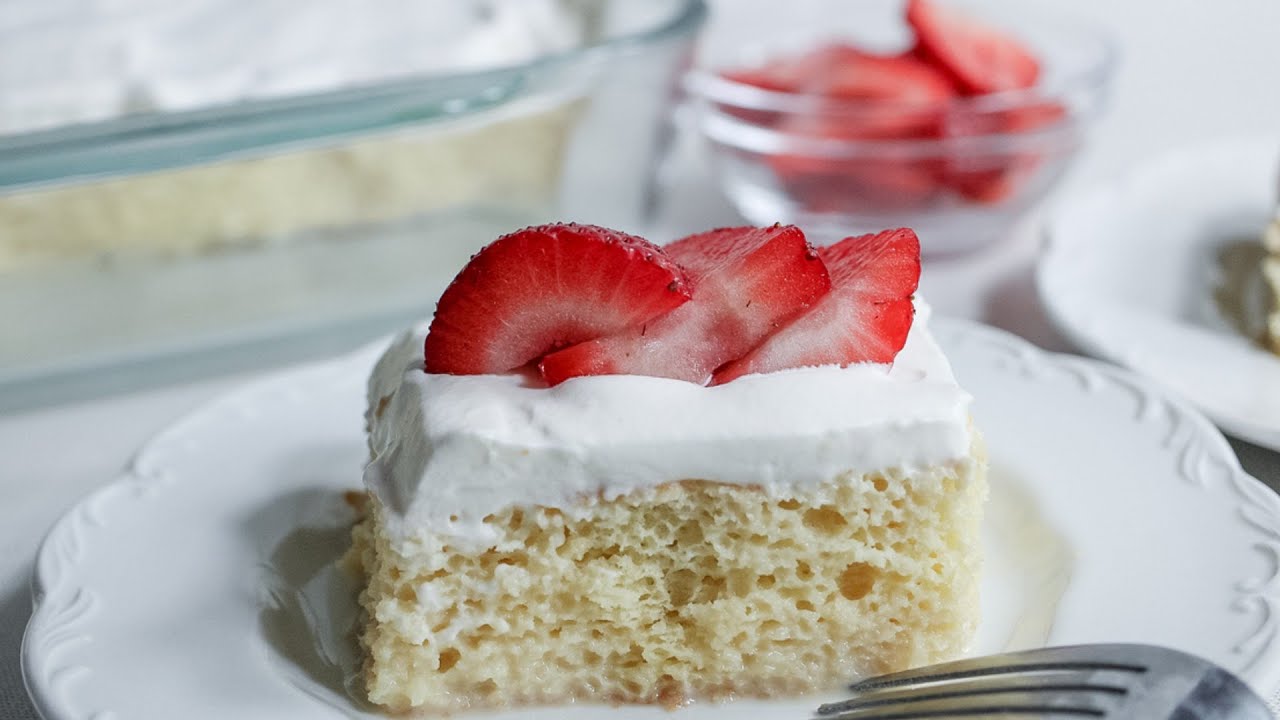
Tres Leches Cake is a light sponge cake soaked in a mixture of three milks and topped with softly whipped cream.

Its name means “three milks,” referring to the traditional combination of evaporated milk, sweetened condensed milk, and whole milk or cream.

The dessert is enjoyed throughout Mexico and across Latin America. It frequently appears at birthday celebrations, weddings, holidays, family gatherings, and restaurant tables.

What makes Tres Leches Cake so memorable is its texture. The sponge cake absorbs the milk mixture while remaining light enough to hold its shape. The result is rich and moist without becoming heavy.

Fresh fruit, cinnamon, toasted coconut, or chocolate may be added, but the classic combination of milk-soaked sponge cake and whipped cream remains the heart of the dessert.

Why This Dish Matters

Tres Leches Cake reflects the celebratory side of the Mexican table.

It is usually made to be shared. The dessert is large enough for a gathering, easy to decorate, and even better after chilling for several hours.

It also demonstrates how simple pantry ingredients can become something elegant when prepared with care.

Recipe at a Glance

Preparation Time: 25 minutes
Cooking Time: 25–30 minutes
Chilling Time: Minimum 4 hours
Total Time: Approximately 5 hours
Difficulty: Easy to Moderate
Servings: 12

Ingredients

For the Sponge Cake

  • 1 cup all-purpose flour
  • 1½ teaspoons baking powder
  • ¼ teaspoon kosher salt
  • 5 large eggs, separated
  • 1 cup granulated sugar, divided
  • ⅓ cup whole milk
  • 1 teaspoon pure vanilla extract

For the Three-Milk Soak

  • 1 can evaporated milk, 12 ounces
  • 1 can sweetened condensed milk, 14 ounces
  • ½ cup whole milk or heavy cream
  • 1 teaspoon vanilla extract, optional

For the Whipped Topping

  • 1½ cups heavy whipping cream
  • 3 tablespoons powdered sugar
  • 1 teaspoon vanilla extract

For Garnishing

  • Fresh strawberries or mixed berries
  • Ground cinnamon
  • Toasted coconut, optional
  • Fresh mint, optional

Preparation

Step 1: Prepare the Oven and Pan

Preheat the oven to 350°F.

Lightly grease a 9-by-13-inch baking dish.

Dust the pan lightly with flour or line the bottom with parchment paper.

Step 2: Combine the Dry Ingredients

In a medium bowl, whisk together:

  • All-purpose flour
  • Baking powder
  • Salt

Set the mixture aside.

Step 3: Beat the Egg Yolks

Place the egg yolks in a large mixing bowl.

Add ¾ cup of the granulated sugar.

Using an electric mixer, beat the yolks and sugar for approximately 3–4 minutes, or until the mixture becomes pale, thick, and creamy.

Stir in the whole milk and vanilla extract.

Add the flour mixture and stir gently until just combined.

Do not overmix.

Step 4: Beat the Egg Whites

Place the egg whites in a separate clean, grease-free bowl.

Beat the whites until soft peaks begin to form.

Gradually add the remaining ¼ cup of granulated sugar.

Continue beating until stiff, glossy peaks form.

Step 5: Fold the Mixtures Together

Fold approximately one-third of the beaten egg whites into the yolk and flour mixture.

This first addition will lighten the batter.

Gently fold in the remaining egg whites in two additions.

Use a large spatula and fold from the bottom of the bowl upward. Avoid stirring aggressively or deflating the egg whites.

Step 6: Bake the Cake

Pour the batter into the prepared baking dish and spread it evenly.

Bake for approximately 25–30 minutes, or until the top is lightly golden and a toothpick inserted into the center comes out clean.

Remove the cake from the oven and allow it to cool completely in the baking dish.

Step 7: Prepare the Three-Milk Mixture

In a large measuring cup or bowl, whisk together:

  • Evaporated milk
  • Sweetened condensed milk
  • Whole milk or heavy cream
  • Vanilla extract, if using

Continue whisking until the mixture is smooth and evenly combined.

Step 8: Soak and Chill the Cake

Using a fork, wooden skewer, or toothpick, poke holes over the entire surface of the cooled cake.

Slowly pour the three-milk mixture over the cake, allowing the liquid to absorb gradually.

Pay particular attention to the corners and edges.

Cover the baking dish and refrigerate the cake for at least 4 hours.

For the best flavor and texture, allow the cake to chill overnight.

Step 9: Prepare the Whipped Topping

Place the heavy whipping cream, powdered sugar, and vanilla extract in a chilled mixing bowl.

Beat until medium peaks form.

The whipped cream should hold its shape while remaining soft and spreadable.

Spread the whipped topping evenly over the chilled cake.

Step 10: Garnish and Serve

Decorate the cake with fresh strawberries or mixed berries.

Finish with a light dusting of ground cinnamon.

Add toasted coconut or fresh mint, if desired.

Slice the cake into squares and serve cold.

Chef’s Notes

  • The egg whites provide the structure that allows the cake to absorb the milk mixture without collapsing.
  • Fold the egg whites gently into the batter. Overmixing will remove the air and create a heavier cake.
  • Allow the cake to cool completely before adding the milk mixture.
  • Pour the milk slowly and evenly so it reaches the center, corners, and edges.
  • The cake should be thoroughly chilled before serving.
  • Tres Leches Cake often tastes even better the following day, making it an excellent make-ahead dessert.
  • Store the cake covered in the refrigerator.

Garnishing and Presentation

Cut the chilled cake into neat squares and serve it on chilled dessert plates.

Finish each piece with:

  • A fresh strawberry or several mixed berries
  • A small dusting of cinnamon
  • A light drizzle of sweetened condensed milk, optional
  • A mint leaf, optional

For a birthday, anniversary, or other celebration, decorate the entire cake with berries arranged around the outer edges.

Suggested Pairings

Wine

  • Moscato
  • Late-harvest Riesling
  • Sparkling wine

Coffee

  • Café de olla
  • Espresso
  • Cinnamon coffee

Family-Friendly Beverages

  • Cold milk
  • Mexican hot chocolate
  • Strawberry agua fresca
  • Cinnamon tea

5-Minute Travel Version

Use prepared pound cake, sponge cake, or angel-food cake.

Cut the cake into individual portions and poke each piece several times with a fork.

Mix together evaporated milk, sweetened condensed milk, and whole milk.

Spoon the mixture slowly over each piece of cake.

Top with prepared whipped cream, ground cinnamon, and fresh strawberries.

Allow the cake to sit for several minutes before serving so it can absorb the milk.

Gregg’s Passport Notes 

Some of Mexico’s finest travel memories happen during celebrations.

Music fills the room. Families gather. Food keeps arriving. Dessert is not merely the end of the meal; it is part of the occasion.

Travelers can learn just as much from a local family celebration, neighborhood bakery, or small café as they can from a famous attraction.

Slow down, accept the second slice, and enjoy the people around the table.

Where to Experience This Dish

 Throughout Mexico

Tres Leches Cake is served in bakeries, cafés, family restaurants, and homes across the country.

Mexico City and Oaxaca both offer wonderful opportunities to explore traditional desserts alongside coffee, chocolate, pastries, and regional sweets.

Central Texas Picks

Mexican bakeries, panaderías, restaurants, and specialty dessert shops throughout the Waco–Temple–Killeen area may offer Tres Leches Cake by the slice or as a full cake.

Because flavors and toppings vary, confirm current availability before visiting.

  1. Taqueria Mexico Restaurant – Killeen
  2. Mas Fajitas Mexican Restaurant – Killeen
  3. La Cocina – Robinson
  4. Fuego Tortilla Grill – Waco
  5. Casa De Castillo – Waco
  6. Ninfa’s Mexican restaurant – Waco


This feature also creates an excellent opportunity to spotlight a local bakery or family-owned restaurant.

Turn This Recipe Into Your Next Vacation

When you are ready to experience Mexico’s colorful communities, historic cities, beautiful coastlines, regional cuisine, markets, bakeries, and warm hospitality, Travel-a-Go-Go Travel would be honored to help create the journey.

Dream Trips. Done Deals. Relax…We’ve Got This!

Prep Time

Cook Time

Servings

Difficulty

Ingredients

Sponge cake Evaporated milk Condensed milk Heavy cream Whipped topping

Prep Time

Cook Time

Servings

Difficulty

Ingredients

Sponge cake Evaporated milk Condensed milk Heavy cream Whipped topping

Gregg’s Mediterranean Garden Treasure Boats

Inspired by the Mediterranean. Created in Central Texas.

Mediterranean flavor, lots of fresh herbs, plenty of volume, a little pasta for comfort, protein from the sardines, and crunch from the pine nuts. The zucchini boats also make it feel playful and special.

Makes: 2 generous servings
Time: About 35 minutes
Estimated calories: Approximately 340–380 per serving, depending on the sardines and peppers used

Ingredients:

  • 2 medium zucchini
  • 2 ounces dry orecchiette, about a generous ½ cup
  • 1 tin sardines, drained
  • 1 large fresh tomato, diced
  • ⅓ cup roasted red peppers or marinated peppers, drained and chopped
  • 2 tablespoons banana peppers, chopped
  • 1 small shallot, finely chopped
  • 2 garlic cloves, minced
  • 1 tablespoon of pine nuts
  • 2 teaspoons of olive oil
  • 1 fresh lemon
  • 1 teaspoon honey
  • ¼ cup chopped fresh parsley
  • 2 tablespoons chopped fresh basil
  • 1 tablespoon chopped fresh mint
  • 1 teaspoon chopped fresh oregano
  • One very small pinch chopped rosemary
  • Fresh lettuce for serving
  • Black pepper
  • Salt, only if needed
  • If your sardines are packed in olive oil, reserve about 1 teaspoon of their oil and use it in place of some of the regular olive oil.

How to Prepare:

1. Make the zucchini boats

  • Heat the oven to 425°F.
  • Cut the zucchini in half lengthwise. Using a teaspoon, scoop out the center of each half, leaving roughly a ¼-inch border so the zucchini holds its shape.
  • Chop the scooped-out zucchini flesh and set it aside.
  • Place the hollowed zucchini on a baking sheet. Brush lightly with 1 teaspoon olive oil and season with black pepper. Roast, cut side up, for 10–12 minutes.

2. Cook pasta

  • Cook the orecchiette in lightly salted water until just al dente.
  • Before draining, reserve about ⅓ cup of pasta water. Drain the pasta and set it aside.

3. Toast the pine nuts

  • Place the pine nuts in a dry skillet over medium-low heat. Toast for 2–3 minutes, stirring frequently, until lightly golden and fragrant.
  • Remove them immediately so they do not burn.

4. Make the garden filling

  • In the same skillet, heat the remaining teaspoon of olive oil.
  • Add shallot and chopped zucchini flesh. Cook for about 4 minutes, until softened and beginning to brown.
  • Add the garlic and cook for 30 seconds.
  • Stir in the tomatoes, roasted peppers and banana peppers. Cook for another 2 minutes, just until the tomatoes begin to soften.
  • Add the cooked orecchiette.
  • Break the sardines into bite-sized pieces and gently fold them into the mixture. Keep some of the pieces intact so the filling has texture rather than becoming completely mashed.

5. Make the lemon-herb “sunshine” sauce

  • In a small bowl, combine:
  • Zest from half the lemon
  • Juice from the whole lemon
  • 1 teaspoon honey
  • 2 tablespoons reserved pasta water
  • Parsley
  • Basil
  • Mint
  • Oregano
  • Tiny pinch of rosemary
  • Plenty of black pepper
  • Pour about three-quarters of the sauce into the pasta mixture. Toss gently over low heat for about 1 minute.
  • Add another splash of pasta water if the filling seems dry. Taste before adding salt—the sardines, banana peppers and marinated peppers may already provide plenty.

6. Fill and finish the boats

  • Remove the zucchini from the oven.
  • Spoon the warm pasta mixture generously into each zucchini boat. It is perfectly fine for the filling to mound over the top.
  • Sprinkle with the toasted pine nuts.
  • Return the filled boats to the oven for 6–8 minutes, until everything is hot and the zucchini edges are lightly browned.

7. Serve

  • Arrange a small bed of fresh lettuce on each plate. Place two zucchini boats on top and spoon any extra filling around them.
  • Drizzle the reserved lemon-herb sauce over the finished boats. Add a little more fresh mint, parsley or basil on top.
  • What makes it uniquely yours
  • The signature combination is the lemon-honey-mint sauce with savory sardines, roasted peppers and toasted pine nuts. The honey does not make the dish sweet—it softens the lemon and pepper acidity and gives the herbs a brighter flavor.
  • The orecchiette acts like little cups, catching pieces of tomato, pepper, garlic and herbs. Meanwhile, the zucchini and lettuce create enough volume to make the meal filling without requiring a large serving of pasta.

I would save the sage for another recipe. It is wonderful, but in this dish, it could overpower the lemon, mint and basil. This one should taste fresh, sunny and unmistakably Mediterranean.

Basbousa Egypt’s Sweet Semolina Cake

The Story Behind the Dish

After all that savory food…

We need dessert.

Basbousa is a beloved semolina cake found in Egypt and in related forms across the Middle East and surrounding regions.

The cake itself is deliberately simple.

Semolina creates its characteristic texture.

Yogurt contributes moisture.

Coconut appears in many versions.

But the transformation happens after baking.

Warm cake meets fragrant syrup.

The syrup slowly penetrates the semolina, producing a dessert that’s moist and rich without becoming a conventional frosted cake.

Before baking, the batter is traditionally scored into portions and often decorated with almonds or other nuts.

That means when it reaches the table…

It’s already inviting you to take a piece.

Why This Dish Matters

Basbousa is a wonderful example of the importance of syrup-soaked sweets throughout the region.

And it introduces a dessert technique that may be unfamiliar to many American home cooks.

Instead of frosting the cake…

We soak it.

Recipe at a Glance

Prep Time: 20 minutes
Bake Time: 30–35 minutes
Resting/Soaking: 30 minutes
Total Time: About 1½ hours
Difficulty: Easy
Serves: 12

Ingredients

Cake

  • 2 cups coarse semolina
  • ¾ cup granulated sugar
  • ½ cup unsweetened shredded coconut
  • 1 cup plain whole-milk yogurt
  • ½ cup unsalted butter, melted
  • 1 teaspoon baking powder
  • 1 teaspoon vanilla
  • Pinch of salt
  • 12–16 whole blanched almonds

Syrup

  • 1½ cups granulated sugar
  • 1 cup water
  • 1 tablespoon fresh lemon juice
  • 1 teaspoon orange-blossom water, optional
  • 1 teaspoon rose water, optional

Preparation

Step 1 — Make the Syrup

Combine sugar and water in a saucepan.

Bring to a boil.

Reduce heat.

Simmer approximately 8–10 minutes.

Add lemon juice.

Remove from heat.

Add orange-blossom or rose water if using.

Allow syrup to cool.

Step 2 — Prepare the Pan

Preheat oven to 350°F.

Butter a 9×13-inch baking dish.

Step 3 — Mix the Dry Ingredients

Combine:

  • Semolina
  • Sugar
  • Coconut
  • Baking powder
  • Salt

Step 4 — Add the Wet Ingredients

Add:

  • Yogurt
  • Melted butter
  • Vanilla

Fold until evenly combined.

Do not aggressively overmix.

Step 5 — Spread & Rest

Spread batter evenly into the prepared dish.

Let it rest approximately 10 minutes.

Step 6 — Score

Using a knife, gently score the surface into diamonds or squares.

Place one almond in the center of each piece.

Step 7 — Bake

Bake approximately 30–35 minutes until golden.

For additional browning, you may briefly use the broiler at the end—but watch it constantly.

Step 8 — Add the Syrup

This is the magic.

While the cake is still hot, slowly pour the cool syrup over the entire surface.

Listen.

You’ll probably hear it soaking in.

Step 9 — Wait

I know.

It’s difficult.

Let the Basbousa sit approximately 30 minutes so the syrup can absorb.

Then recut along the scored lines.

Chef’s Notes

Use semolina, not ordinary all-purpose flour.

That’s what gives Basbousa its distinctive texture.

Don’t pour hot syrup onto a screaming-hot syrup mixture. We want temperature contrast to encourage absorption.

And don’t drown the cake all at once.

Pour slowly and evenly.

Garnishing & Presentation

Serve individual diamonds or squares.

Finish with:

  • Almond
  • Pistachios, optional
  • Coconut
  • Tiny amount of orange zest

Serve beside strong coffee or tea.

☕ Beverage Pairing

Traditional: Egyptian tea
Coffee: Strong Arabic-style coffee
Family-Friendly: Mint tea or cinnamon-orange tea

⏱️ 5-Minute Travel Version

Purchase a plain semolina or almond cake.

Warm gently.

Drizzle with a simple lemon-orange-blossom syrup.

Top with almonds or pistachios.

Make tea.

Nobody needs to know how long dessert took.

✈️ Gregg’s Passport Notes

Egypt deserves more than a rushed checklist.

Yes, see the pyramids.

Yes, visit the temples.

Yes, stand somewhere and try to comprehend how people built these things thousands of years ago.

But also…

Sit beside the Nile.

Drink tea.

Eat dessert.

Talk to people.

Watch the sunset.

The monuments tell you about ancient Egypt.

The people and their tables introduce you to Egypt today.

📍 Where to Experience It

Cairo, Alexandria, Luxor & Beyond

Look for Basbousa in Egyptian bakeries and sweet shops.

And don’t stop at one dessert.

Consider that an official Global Kitchen instruction.

🌎 Turn This Recipe Into Your Next Vacation

Imagine finishing dinner in Egypt.

Tea arrives.

Then Basbousa.

Warm spices linger in the air.

The Nile is nearby.

Tomorrow you’ll walk through places you’ve seen in books your entire life.

Tonight…

You’re simply sitting at a table.

And perhaps that’s when you realize:

The trip you once imagined is actually happening.

When you’re ready to make that happen…

Travel-a-Go-Go Travel will be ready to take care of the details.

Dream Trips. Done Deals. Relax…We’ve Got This!

Bright Citrus, Warm Spices & Dinner Around the Table

The Story Behind the Dish

Not every recipe needs a centuries-old legend attached to it.

Sometimes a dish represents the broader flavors of a kitchen.

This chicken brings together ingredients at home in Egyptian and wider regional cooking:

Garlic.

Cumin.

Coriander.

Lemon.

Olive oil.

Fresh herbs.

Olives.

Slow cooking allows those flavors to settle into tender chicken and a deeply aromatic sauce.

And while you’ll encounter countless variations of seasoned chicken throughout Egypt, this Global Kitchen version is designed specifically to give the home cook an approachable Egyptian-inspired family dinner.

That’s an important distinction.

We’re celebrating Egyptian flavors without inventing a historical origin the dish doesn’t have.

Recipe at a Glance

Prep Time: 20 minutes
Marinating: 30 minutes–4 hours
Cooking Time: 50–60 minutes
Difficulty: Easy to Moderate
Serves: 4–6

Ingredients

  • 6 bone-in chicken thighs
  • 3 tablespoons extra-virgin olive oil
  • Juice of 2 lemons
  • Zest of 1 lemon
  • 5 garlic cloves, minced
  • 1 teaspoon ground cumin
  • 1 teaspoon ground coriander
  • ½ teaspoon turmeric
  • ½ teaspoon paprika
  • ¼ teaspoon cinnamon
  • 1 teaspoon kosher salt
  • ½ teaspoon black pepper
  • 1 large onion, sliced
  • 1 cup chicken stock
  • ¾ cup green olives
  • ¼ cup chopped fresh parsley
  • 2 tablespoons chopped fresh cilantro
  • Lemon slices for serving

Preparation

Step 1 — Make the Marinade

Combine:

  • Olive oil
  • Lemon juice
  • Lemon zest
  • Garlic
  • Cumin
  • Coriander
  • Turmeric
  • Paprika
  • Cinnamon
  • Salt
  • Pepper

Step 2 — Marinate the Chicken

Place chicken in a shallow dish or food-safe bag.

Pour marinade over it.

Refrigerate at least 30 minutes, preferably several hours.

Step 3 — Brown the Chicken

Preheat oven to 375°F.

Heat an oven-safe skillet or Dutch oven over medium-high heat.

Remove chicken from marinade.

Brown skin-side down approximately 5 minutes.

Turn.

Cook another 2 minutes.

Remove.

Step 4 — Cook the Onion

Reduce heat.

Add sliced onion.

Cook approximately 5–7 minutes.

Step 5 — Build the Sauce

Return chicken to the pan.

Add chicken stock and remaining marinade.

Bring to a gentle simmer.

Step 6 — Bake

Cover loosely.

Transfer to oven.

Bake approximately 35 minutes.

Step 7 — Add Olives

Remove cover.

Add olives.

Continue baking another 15–20 minutes until the chicken is browned and safely cooked through.

Step 8 — Finish

Remove from oven.

Rest approximately 10 minutes.

Scatter parsley and cilantro over the chicken.

Add fresh lemon slices.

Spoon that sauce over everything.

Chef’s Notes

Bone-in thighs stay juicy and forgiving.

If you prefer breasts, monitor them carefully because they cook faster and can dry out.

And don’t skip the resting period.

Give the juices a few minutes to settle.

Garnishing & Presentation

Serve on a large platter.

Surround the chicken with:

  • Olives
  • Lemon slices
  • Fresh parsley
  • Cilantro

Serve alongside rice, roasted vegetables or warm flatbread.

🍷 Beverage Pairing

Wine: Dry white such as Sauvignon Blanc or Assyrtiko
Traditional-inspired: Mint tea
Family-Friendly: Lemon-mint sparkling water

⏱️ 5-Minute Travel Version

Use rotisserie chicken.

Warm gently with:

  • Olive oil
  • Garlic
  • Lemon
  • Cumin
  • Coriander
  • Olives

Finish with fresh herbs.

Not traditional Sunday cooking.

But very respectable Wednesday-night traveling.

✈️ Gregg’s Passport Notes

One of the experiences I’d encourage in Egypt is seeing the country from the Nile.

The landscape changes.

The pace changes.

And suddenly ancient sites that seemed like isolated places on a map begin connecting to one another.

The Nile isn’t simply something flowing through Egypt.

It’s part of the reason Egypt exists.

Give yourself time to experience it rather than merely photograph it.

📍 Where to Experience It

Along the Nile

From Cairo south toward Luxor and Aswan, meals become part of the Nile experience.

Try regional dishes.

Ask what the kitchen recommends.

And occasionally order something you can’t pronounce.

Those are often the best stories later.

🌎 Turn This Recipe Into Your Next Vacation

Imagine dinner aboard a Nile cruise.

The sun is disappearing.

Palm trees line the riverbank.

The desert stretches beyond them.

A meal arrives.

You smell garlic, citrus and spices.

And suddenly you’re not reading about Egypt anymore.

You’re there.

When you’re ready…

Travel-a-Go-Go Travel can turn that dream into the journey.

Dream Trips. Done Deals. Relax…We’ve Got This!

Koshari Cairo — Egypt’s Beloved National Comfort Food

The Story Behind the Dish

At first glance, Koshari sounds like someone opened the pantry and decided to use everything.

Rice.

Lentils.

Pasta.

Chickpeas.

Tomato sauce.

Crispy onions.

But somehow…

It works beautifully.

Koshari developed into one of Egypt’s most recognizable everyday foods, particularly associated with Cairo’s inexpensive restaurants and street-food culture.

Its individual components reflect layers of outside influence and Egyptian adaptation over time. What matters most today is what Koshari became:

Distinctly Egyptian.

It’s filling.

Affordable.

Plant-based.

Comforting.

And wonderfully customizable.

A bowl arrives in layers before being topped with spicy tomato sauce, vinegar-garlic sauce and a mountain of crisp fried onions.

It may not be the prettiest dish we’ve ever cooked.

But after the first few bites…

You probably won’t care.

Why This Dish Matters

Koshari demonstrates something we encounter repeatedly through Global Kitchen:

Great food doesn’t require expensive ingredients.

Rice, lentils, pasta and chickpeas are pantry staples.

Yet together—with the right sauce, seasoning and texture—they became one of the defining foods of an entire country.

Recipe at a Glance

Prep Time: 30 minutes
Cooking Time: 45 minutes
Total Time: Approximately 1 hour 15 minutes
Difficulty: Moderate
Serves: 6

Ingredients

Lentils & Rice

  • 1 cup brown lentils
  • 1 cup long-grain rice
  • 2 cups water or vegetable stock
  • 1 teaspoon ground cumin
  • ½ teaspoon ground coriander
  • 1 tablespoon olive oil
  • ½ teaspoon salt

Pasta & Chickpeas

  • 1½ cups small elbow macaroni or ditalini
  • 1 can (15 ounces) chickpeas, drained and rinsed

Tomato Sauce

  • 2 tablespoons olive oil
  • 1 small onion, finely chopped
  • 4 garlic cloves, minced
  • 1 can (28 ounces) crushed tomatoes
  • 2 tablespoons tomato paste
  • 1 teaspoon ground cumin
  • 1 teaspoon ground coriander
  • ½ teaspoon red pepper flakes, optional
  • 1 tablespoon white vinegar
  • Salt and black pepper to taste

Crispy Onions

  • 2 large yellow onions, very thinly sliced
  • ½ cup all-purpose flour
  • Vegetable oil for frying
  • Pinch of salt

Garlic-Vinegar Sauce

  • 3 garlic cloves, finely minced
  • ¼ cup white vinegar
  • ¼ cup water
  • ½ teaspoon cumin
  • Pinch of salt

Preparation

Step 1 — Cook the Lentils

Rinse the lentils.

Place in a saucepan and cover generously with water.

Bring to a boil, reduce heat and simmer approximately 15–20 minutes.

They should be tender but still hold their shape.

Drain.

Step 2 — Prepare the Rice

Heat olive oil in a saucepan.

Add rice, cumin and coriander.

Stir approximately one minute.

Add water or stock and salt.

Bring to a boil.

Cover, reduce heat and cook according to the rice package directions.

Fold the cooked lentils into the rice.

Keep warm.

Step 3 — Cook the Pasta

Cook pasta in salted water until al dente.

Drain.

Set aside.

Step 4 — Warm the Chickpeas

Place the chickpeas in a small saucepan with a splash of water.

Warm gently.

Drain before serving.

Step 5 — Make the Tomato Sauce

Heat olive oil over medium heat.

Add onion.

Cook approximately 5 minutes.

Add garlic.

Cook 30 seconds.

Add:

  • Crushed tomatoes
  • Tomato paste
  • Cumin
  • Coriander
  • Red pepper flakes

Simmer approximately 15–20 minutes.

Stir in vinegar.

Season with salt and pepper.

Step 6 — Make the Crispy Onions

Toss sliced onions lightly with flour.

Shake off excess.

Heat approximately ½ inch of vegetable oil in a skillet.

Working in batches, fry onions until deeply golden and crisp.

Drain on paper towels.

Salt immediately.

And try not to eat all of them before dinner.

Step 7 — Make the Garlic-Vinegar Sauce

Combine garlic, vinegar, water, cumin and salt.

Bring briefly to a simmer.

Remove from heat.

Step 8 — Build Your Koshari

Traditionally, this is all about layers.

Start with:

Rice & lentils

Then:

Pasta

Then:

Chickpeas

Spoon tomato sauce generously over the top.

Add garlic-vinegar sauce to taste.

Finish with plenty of crispy onions.

Chef’s Notes

Don’t overcook the lentils.

Texture matters.

And don’t underestimate those onions.

The crispy topping provides an essential contrast to the soft rice, lentils and pasta.

Make extra.

You’ll understand why.

Garnishing & Presentation

Serve Koshari in deep bowls.

Make the layers visible.

Finish generously with:

  • Crispy onions
  • Chickpeas
  • Tomato sauce
  • Optional chili sauce

Put additional vinegar sauce and hot sauce on the table so everyone can customize their bowl.

🥤 Beverage Pairing

Traditional-inspired: Hibiscus tea (karkade)
Tea: Egyptian-style black tea with mint
Family-Friendly: Fresh lemonade with mint

⏱️ 5-Minute Travel Version

Use:

  • Microwaveable rice
  • Precooked lentils
  • Canned chickpeas
  • Prepared pasta
  • Quality tomato sauce
  • Store-bought crispy onions

Season the tomato sauce with cumin and a splash of vinegar.

Layer everything.

Top aggressively with onions.

Cairo in ten minutes.

We’re still calling it five.

✈️ Gregg’s Passport Notes

Cairo can feel overwhelming when you first arrive.

It’s enormous.

It’s busy.

It’s noisy.

And that’s part of its personality.

Don’t experience Egypt only through monuments.

Walk somewhere with a guide.

Visit a market.

Try street food from a reputable vendor.

Sit in a café.

Watch everyday life happening around you.

The pyramids will leave you speechless.

But sometimes the meal you ate afterward becomes part of the story too.

📍 Where to Experience It

Cairo, Egypt

For Koshari, Cairo is the obvious destination.

You’ll find specialized Koshari restaurants as well as humble neighborhood establishments serving their own versions.

Try more than one.

Global Kitchen officially considers that research.

🌎 Turn This Recipe Into Your Next Vacation

Imagine spending the morning standing before the pyramids.

Later you’re back in Cairo.

You’re hungry.

Someone puts a bowl of Koshari in front of you.

Rice.

Lentils.

Pasta.

Tomato.

Crispy onions.

You’ve eaten this before.

But never here.

That’s when a recipe becomes a memory.

And when you’re ready to make that memory…

Travel-a-Go-Go Travel will help get you there.

Dream Trips. Done Deals. Relax…We’ve Got This!

Saffron-Roasted Chicken with Crispy Potatoes & Asparagus

Serves: 2–3
Time: about 45 minutes
Style: light, savory, aromatic, not heavy
Approx. calories: 450–550 per serving, depending on the chicken legs and amount of potato/oil

Ingredients

  • 2–3 chicken legs
  • 2 medium russet potatoes
  • 1–2 cups asparagus, cut into 2-inch pieces
  • 1 cup black mushrooms, sliced
  • 2–3 sun-dried tomatoes, finely chopped
  • 2–3 pickled peppers, sliced
  • 1 small onion, sliced — if you have one
  • 1 good pinch saffron
  • 2 tbsp olive oil, divided
  • 2 cloves garlic, minced
  • ½ lemon
  • ½–¾ cup water or chicken stock
  • Salt and freshly ground black pepper

Fresh herbs: parsley is my first choice, with a little thyme or rosemary. If you have dill, a small amount at the end is surprisingly good.

The method

  1. Start the saffron.
    Put the saffron in ½ cup warm water or stock and let it sit while you prepare everything else. This pulls much more flavor and color out of the saffron.
  2. Get the potatoes going.
    Heat the oven to 425°F.

Cut the potatoes into roughly 1-inch chunks. Toss them with 1 tbsp olive oil, salt and pepper and spread them on a sheet pan or large ovenproof skillet.

Roast for 15 minutes.

  1. Season the chicken.
    Pat the chicken legs dry. Rub with the remaining tablespoon of olive oil, salt, pepper and a little minced garlic.

After the potatoes have roasted for 15 minutes, push them toward the edges and put the chicken in the center.

Roast another 15 minutes.

  1. Add the vegetables.
    Add the mushrooms, asparagus, sun-dried tomatoes and pickled peppers around the chicken.

Pour the saffron liquid around the vegetables—not directly over the chicken skin.

Roast another 10–15 minutes, until the chicken reaches 165°F minimum at the thickest part and the potatoes are browned.

  1. Make it into a sauce.
    Take the chicken out and put it on a plate to rest.

Put the roasting pan over medium heat. Add the juice of ½ lemon and scrape up all those browned bits. If the pan looks dry, add another splash of water/stock.

Let it bubble for 1–2 minutes.

Taste it. The combination of saffron + lemon + sun-dried tomato + pickled pepper should give you a really interesting sweet/sour/savory flavor without needing much fat.

  1. Finish with herbs.
    Turn off the heat and stir in a generous handful of chopped fresh parsley and a little thyme.

Return the chicken to the pan and spoon the saffron pan juices over everything.

The trick that makes this special

Don’t use a lot of the sun-dried tomatoes or pickled peppers. They’re seasoning ingredients here, not vegetables.

The saffron gives the dish an almost luxurious flavor, while the pickled peppers provide the acidity that keeps the chicken and potatoes from feeling heavy. The mushrooms soak up the saffron-lemon juices beautifully.

And because you’re roasting the potatoes rather than making mashed potatoes or a creamy sauce, the whole thing stays surprisingly light.

One variation I’d especially recommend: if you have fresh mint, chop just a little into the finished dish along with the parsley. Saffron + lemon + mint + roasted chicken is an excellent combination.

Mediterranean Pappardelle with Garden Vegetables, Lemon, Capers & Shrimp

Inspired by the Mediterranean. Created in Central Texas.


 Perfect For you to choose….for your occasion…

  • A warm-weather patio dinner is what I see.
  • Dinner for two when you want something special without spending all evening cooking.
  • Friends on the patio with a bottle of chilled wine and crusty bread in the middle of the table.
  • A Saturday farmers-market dinner where you buy whatever looks best that morning and cook that evening.

 Or my favorite:

  • The “We’re Not Going Anywhere Tonight” Dinner
  • No plans. No dress code. No restaurant reservation.
  • Just good food, music, wine, and people you enjoy being around.

 Set the Table

Don’t make this formal.

I’d use a Mediterranean garden-table feeling:

Natural wood or a simple white tablecloth.

White or blue-and-white dishes.

Cloth napkins.

A small cutting board with warm crusty bread.

Lemons in a bowl.

A few sprigs of rosemary, basil, or oregano from the garden instead of an elaborate floral centerpiece.

Small candles or lanterns if you’re eating outside.

And put the finished pappardelle in one large serving bowl in the center of the table.

Let everyone serve themselves.

That’s part of the feeling.

 In the Glass

My First Choice: Sauvignon Blanc

Bright acidity works beautifully with the lemon, capers, herbs, and shrimp.

Something Italian: Vermentino

This may be my favorite thematic pairing. Crisp, citrusy and Mediterranean in personality without overpowering the seafood.

Rosé

A dry Provence-style rosé would be excellent for an outdoor summer dinner.

Cocktail

Limoncello Spritz

Limoncello, Prosecco, sparkling water, and lemon.

Simple, refreshing and visually perfect beside this dish.

No Alcohol

Lemon-Basil Sparkler

Fresh lemon juice, sparkling water, basil, a touch of honey and plenty of ice.

Now even the non-drinker gets something intentionally paired with dinner rather than simply “water or tea.”

 On the Playlist

I wouldn’t give readers one required song. Music rights and individual taste make a mood much more useful.

For this dinner:

Mediterranean Sunset

Think:

Italian acoustic guitar
Soft Mediterranean jazz
Modern Italian café music
A little Spanish guitar
Easy coastal instrumentals

Then give readers a simple instruction:

Search your favorite music service for “Mediterranean Dinner,” “Italian Café” or “Mediterranean Acoustic,” turn it down just enough for conversation, and leave your phone alone.

 From the Garden (I want to make this another permanent section).

Tonight, From Gregg’s Garden this recipe uses what I have ready and fresh in my garden*:  Zucchini • Parsley • Basil • Oregano

Then a short note:

*The recipe doesn’t have to be identical every time. If the garden gives you yellow squash instead of zucchini, use it. Have fresh cherry tomatoes that need picking? Add a handful. That’s how this dish was created in the first place.

The garden helps decide what’s for dinner.

Your Gregg’s Kitchen recipe this week: Mediterranean Pappardelle with Garden Vegetables, Lemon, Capers & Shrimp

Serves 4,
Prep 15 minutes,
Cook 20 minutes

Ingredients:

•12 ounces pappardelle,
•8 ounces shrimp.
•3 tablespoons extra virgin olive oil.
•3 anchovy fillets minced.
•3 cloves garlic minced.
•1 medium zucchini, diced.
•2 tablespoons capers drained. •1 quarter cup chopped pickled peppers.
•1/2 teaspoon red pepper flakes optional.
•Zest and juice of 1 lemon.
•1/4 cup chopped fresh parsley.
•2 tablespoons fresh basil.
•1 teaspoon fresh oregano or half teaspoon dried.
•Salt.

-Optional cheese for serving.

Directions:

•Cook pasta al dente.
•Sear shrimp, set aside.
•Sauté garlic, zucchini, capers, peppers.
•Add lemon zest and juice with a splash of pasta water.
•Toss pasta in sauce, then fold in shrimp and herbs.
•Finish with pepper and optional cheese.

If the pasta and veggies start to lose its silky coating, add another ¼ cup of pasta water and mix well. Add cheese at that time if you desire and let it become part of that silky coating.

Now sit down at your table, music playing in the softly in the background and enjoy a really light and delicious meal with your favorite glass of wine or spritzer, whatever you desire. It’s your moment with your friends, family, loved one or just by yourself. It’s your escape, relax and enjoy it.

I’ll see you next week.

(And this is where I think I’ve found the difference between the two brands).

“Travel Without a Ticket / Global Kitchen” says:       “Let me introduce you to their table.”

 “From Gregg’s Kitchen” says:  “Come sit at mine.”

 To me, that’s a significant distinction.

 Global Kitchen teaches authentic cuisine, origins, culture, and destination.

 “From Gregg’s Kitchen” becomes food + home + garden + market + atmosphere + entertaining + inspiration.

 So let me know what you suggest and think is best. I already have over 50 recipes of my own tried and tested. I really don’t care how you want to publish this. You have the general idea. Talk among yourselves and let me know what you would do differently. I do think we need to reference the other blog “Travel Without a Ticket” and it reference “From Gregg’s Kitchen”.

 Looking forward to what you come up with.

Thanks,

 Gregg

Here’s a few more recipes you can use to add in the Recipe library you’ll build for “From Gregg’s Kitchen”.